12 Best Nail Art Tips and Tricks for Stunning Manicures
Nail Art Tips and Tricks for Stunning Manicures – Welcome to the world of nail art, where creativity knows no bounds and your fingertips become the canvas for stunning masterpieces. Nail art is a captivating form of self-expression that allows you to transform your nails into miniature works of art.
Whether you’re a seasoned nail artist or a beginner looking to dip your toes (or rather, your nails) into this captivating hobby, you’re in for a treat.
In this guide, we’ll delve into the realm of nail art tips and tricks that will elevate your manicures to a whole new level. From essential tools and techniques to the latest trends and designs, we’ll explore how to achieve stunning nail art that’s sure to turn heads.
Whether you prefer simple, elegant designs or bold and extravagant creations, we’ve got you covered. Get ready to unlock your inner nail artist and embark on a journey of nail transformation that will leave you with dazzling, envy-inducing manicures.
Also, Read – Best Ways To Look Best Without Makeup
Nail art as a form of self-expression
Nail art is more than just a cosmetic adornment; it’s a powerful form of self-expression that allows individuals to showcase their unique personalities, creativity, and style. Just as we use clothing, accessories, and hairstyles to convey our identity to the world, nail art offers an additional, and often overlooked, avenue for self-expression.
Each nail design tells a story, encapsulates a mood, or communicates a sentiment. Whether it’s a bold and vibrant geometric pattern, a delicate floral motif, or a minimalist monochromatic look, your nail art choices can reflect your emotions, interests, and even cultural influences.
Moreover, nail art provides a canvas for experimentation. It encourages individuals to step out of their comfort zones, try new techniques, and push the boundaries of their creativity. The colors, shapes, and designs chosen for nail art can be a reflection of one’s inner world and a means of celebrating individuality.
In a world that often rushes by in a blur, nail art offers a tangible and personal way to slow down, focus on the details, and express oneself artistically.
Whether you’re seeking to make a statement, celebrate a special occasion, or simply brighten your day, nail art allows you to convey your uniqueness, one nail at a time. So, let your fingertips become the canvas for your creativity, and let your nail art speak volumes about who you are.
Also, Read – 9 Korean Anti-Aging Skincare Products
Essential Tools and Supplies
To embark on your nail art journey and create stunning manicures, it’s essential to have the right tools and supplies at your disposal. Here’s a breakdown of the essential items you’ll need:
- Nail Polish: High-quality nail polish in various colors and finishes to create your designs. Opt for brands known for durability and vibrant pigments.
- Base Coat: A clear base coat is crucial to protect your natural nails and provide a smooth surface for polish application.
- Top Coat: A clear top coat helps seal and protect your nail art, adding shine and extending its longevity.
- Nail Polish Remover: Acetone or non-acetone nail polish remover for cleaning and correcting mistakes.
- Nail File and Buffer: Emery boards or glass nail files for shaping and smoothing your nails.
- Cuticle Pusher and Nippers: Tools to gently push back and trim cuticles for a neat appearance.
- Nail Art Brushes: Fine-detail brushes in various sizes for intricate designs and precise lines.
- Dotting Tools: Double-ended tools with different-sized tips for creating dots and embellishments.
- Stamping Kit: If you’re into nail stamping, invest in a kit that includes stamping plates, a scraper, and a stamper.
- Tape or Nail Guides: To create clean lines and geometric patterns in your nail art.
Nail Art Tips and Tricks for Stunning Manicures
Start with Healthy Nails
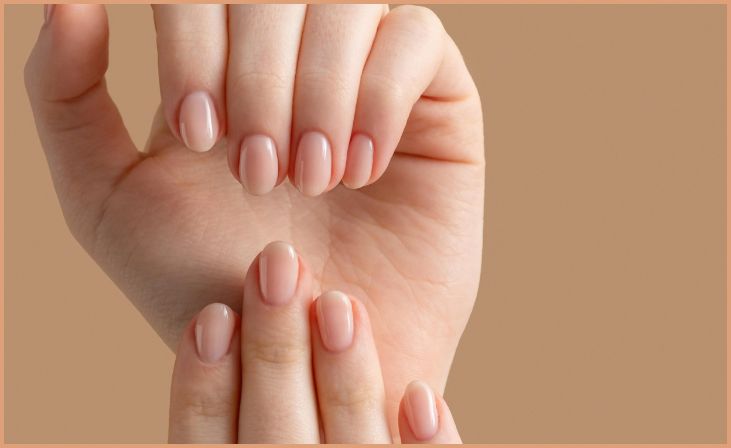
Starting with healthy nails is the foundation of stunning nail art. Begin by maintaining cleanliness and hydration. Trim nails regularly to your desired length and file them to prevent snags. Don’t use your nails as tools to keep them from breaking. Apply a nourishing cuticle oil to keep the cuticles moisturized and healthy. Use a gentle nail polish remover to prevent drying out your nails. Lastly, maintain a balanced diet rich in vitamins and minerals, particularly biotin, which promotes nail health. Healthy nails provide a smooth canvas for your nail art, ensuring it looks vibrant and lasts longer.
Choose the Right Tools

Selecting the right tools is crucial for achieving stunning nail art. Invest in quality brushes with fine tips for precision. Dotting tools allow for creating various-sized dots and intricate designs. Striping tape helps achieve clean lines and geometric patterns. Stencils and stamping kits simplify complex designs. A glass nail file is gentle on nails and prevents splitting. Additionally, a clear, smooth workspace, acetone or nail polish remover for cleanup, and cotton swabs or small brushes are essential. Keep your tools clean and organized to work efficiently. High-quality tools make a noticeable difference in the ease and quality of your nail art creations, ensuring professional-looking results.
Use a Base Coat
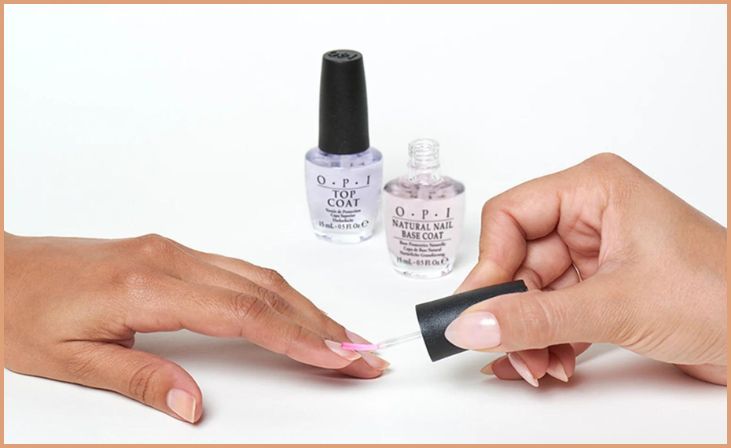
Applying a base coat is a critical step in achieving stunning nail art. This clear or nude-colored layer serves several purposes.
Firstly, it acts as a protective barrier between your natural nail and the colored polish, preventing staining and potential damage. Secondly, it provides a smooth surface for your nail art to adhere to, ensuring a more even and long-lasting finish. Additionally, a base coat can improve the adhesion of your nail polish, reducing the chances of chipping or peeling.
Lastly, it can enhance the vibrancy of your nail art by preventing the color of your natural nails from showing through. By applying a base coat as your starting point, you create a solid foundation that contributes to the overall professional look and durability of your manicure.
Practice Your Brush Skills

Practicing your brush skills is essential for mastering nail art. Start with simple designs and gradually progress to more intricate patterns as your dexterity improves. Here’s a quick guide:
- Control and Precision: Hold the brush lightly, like a pencil, for better control. Practice straight lines and curves to develop steadiness.
- Consistency: Maintain a consistent pressure on the brush to ensure even lines and shapes. Experiment with various brush sizes for different effects.
- Thin Layers: Apply thin layers of nail polish with your brush, allowing each coat to dry before adding more. This prevents smudging and clumping.
- Blending: Experiment with blending colors by layering or dragging wet polish with your brush. This technique creates gradients and fades.
- Detail Work: For intricate details, use a fine nail art brush or a toothpick. Practice intricate patterns like flowers, animals, or geometric shapes.
- Patience: Nail art requires patience. Don’t rush; take your time to perfect each stroke and design.
Regular practice will improve your brush skills, making your nail art more professional and visually appealing.
Also, Read – Best Beauty Benefits Of Coconut Oil
Prep Your Work Area

Creating a well-organized work area is crucial for successful nail art. Here’s how to prepare your space:
- Cleanliness: Ensure your work surface is clean and free from dust or debris that can ruin your manicure.
- Good Lighting: Use ample, bright, and natural lighting. A desk lamp with LED lights or a magnifying lamp can help you see details clearly.
- Tool Organization: Lay out all your nail art tools and polishes within easy reach. This includes brushes, dotting tools, striping tape, stencils, and a palette for mixing colors.
- Nail Polish Remover: Have a small dish of nail polish remover or acetone and cotton swabs or brushes nearby for quick cleanup.
- Paper Towels or Tissues: Keep these handy for wiping brushes and cleaning up spills.
- Workspace Protection: Use a disposable or washable surface protector to catch any nail polish spills or drips.
- Timer: Set a timer to track drying times and ensure you don’t rush the process.
By organizing your workspace, you can work efficiently and reduce the chances of mistakes, resulting in stunning nail art.
Use Nail Polish Thinner

Nail polish thinner is a valuable tool for maintaining your nail art supplies and achieving better results. Here’s how to use it:
- Revive Thickened Polish: If your nail polish has become thick and challenging to apply, add a few drops of nail polish thinner to the bottle. Shake well to restore its original consistency. Avoid using acetone, as it can break down the polish.
- Avoid Clumping: Thinned polish is less likely to clump, ensuring smoother application and more even coverage.
- Extend Polish Life: Thinning your nail polish can extend its shelf life, saving you money in the long run.
- Test and Adjust: Start by adding a drop or two of thinner, then test the consistency. Continue adding drops until you reach your desired thickness, shaking thoroughly between additions.
Remember that over-thinning can make the polish too sheer, so proceed with caution. Using nail polish thinner can help you get the most out of your nail art supplies and create flawless designs.
Nail Polish Cleanup
Nail polish cleanup is essential for achieving a polished nail art look. Follow these steps:
- Wait for Drying: Let your nail art dry completely before attempting cleanup. This prevents smudging or smearing.
- Acetone or Nail Polish Remover: Dip a small, angled brush or a cotton swab into acetone or nail polish remover. Use non-acetone formulas for sensitive skin.
- Precision: Gently and carefully clean around the edges of your nails, removing any excess polish or mistakes. Wipe the brush or swab frequently on a tissue to avoid spreading polish.
- Correct Mistakes: If you make a mistake in your nail art design, you can use a fine brush dipped in remover to correct it. This technique helps refine your designs.
- Final Top Coat: Apply a clear top coat to seal in your design and create a smooth, glossy finish.
With patience and precision, nail polish cleanup ensures your nail art looks neat and professional.
Experiment with Colors and Textures
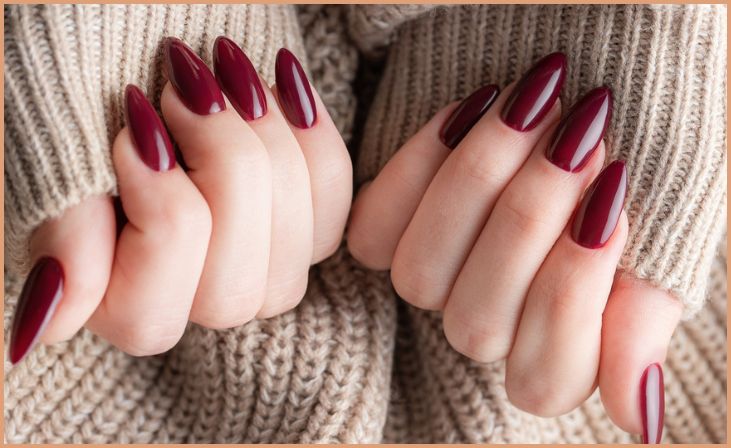
Experimenting with colors and textures is key to creating unique and eye-catching nail art designs:
- Color Combinations: Combine contrasting or complementary colors for striking effects. Experiment with bold and subtle shades to find what suits your style.
- Gradient Nails: Create gradient nails by blending two or more colors together. Use a makeup sponge to achieve a seamless transition between colors.
- Glitter and Metallics: Add sparkle with glitter nail polish or metallic accents. Apply them to the entire nail or as accents for a dazzling look.
- Matte Finish: Try a matte top coat to transform glossy polishes into a velvety finish. This can add sophistication and depth to your designs.
- Texture Play: Explore textured nail polishes like sand, velvet, or caviar beads for tactile interest. These create 3D effects on your nails.
- Nail Art Pens: Invest in nail art pens to easily draw intricate designs or patterns on your nails. They come in various colors for added versatility.
- Negative Space: Leave parts of your nails unpainted to create negative space designs. It’s a minimalist yet trendy approach to nail art.
By experimenting with different colors and textures, you can continually evolve your nail art style, making each manicure a unique expression of your creativity.
Also, Read – Monsoon Skincare Tips for Glowing Skin
Layering and Ombre Techniques
Layering and ombre techniques can add depth and dimension to your nail art:
- Layering:
- Apply multiple coats of different nail polish colors, allowing each layer to dry between coats. This creates a rich, layered effect.
- Experiment with sheer and opaque polishes to achieve subtle or dramatic variations.
- Use a makeup sponge to dab on layers of color for a gradient or marbled look.
- Ombre:
- Create a smooth ombre effect by blending two or more nail polish colors together. Start with one color at the cuticle and another at the tip.
- Use a clean brush or a sponge to gently blend the colors in the middle to achieve a seamless transition.
- Ombre can be horizontal (from side to side) or vertical (from top to bottom) for different effects.
These techniques allow you to play with color transitions and can make your nail art truly captivating. Practice and patience are key to mastering layering and ombre.
Practice Symmetry
Practicing symmetry in your nail art designs can create balanced and visually appealing manicures:
- Centered Start: Begin intricate designs from the center of the nail. This helps maintain symmetry as you work outwards on both sides.
- Mirror Image: Aim for your design to look the same on both hands. Plan and sketch your design first if needed to ensure it’s symmetrical.
- Stencils and Guides: Use stencils, stickers, or tape to help you achieve symmetrical patterns, lines, or shapes.
- Consistency: Be consistent in the size, shape, and spacing of elements in your design, such as dots, lines, or petals.
- Practice: Regularly practice creating symmetrical designs. Over time, your hand control and ability to maintain symmetry will improve.
- Precision Tools: Invest in fine nail art brushes and dotting tools for accurate and symmetrical detailing.
Symmetry enhances the overall aesthetic of your nail art, making it more pleasing to the eye. With practice, you can achieve balanced and stunning manicures.
Seal with Top Coat
Sealing your nail art with a top coat is a crucial final step for a polished and long-lasting manicure:
- Protection: A clear top coat acts as a shield, protecting your nail art from chipping, fading, and daily wear and tear.
- Smooth Finish: It creates a smooth and even surface, covering any slight imperfections in your nail art and providing a glossy finish.
- Enhanced Color: A top coat can intensify the color of your nail polish and nail art, making it appear more vibrant.
- Durability: It helps your nail art last longer by preventing premature chipping and extending the life of your manicure.
- Quick Drying: Opt for a quick-dry top coat to reduce the time you need to wait for your nail art to fully set.
Apply the top coat evenly and allow it to dry thoroughly for a beautiful, protective finish that showcases your stunning nail art.
Nail Art Stamping
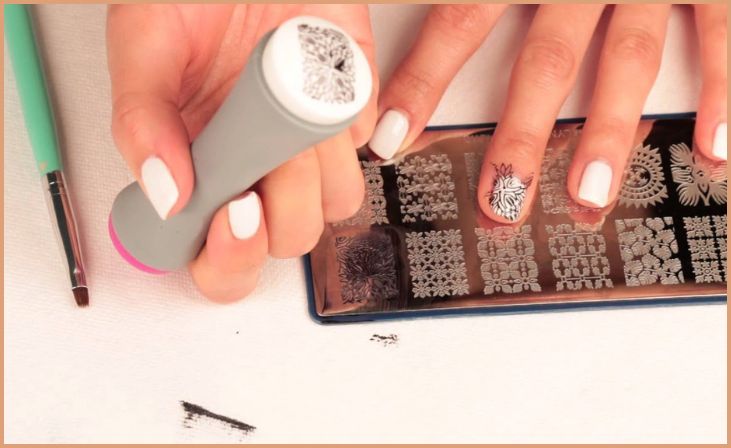
Nail art stamping is a convenient technique to achieve intricate designs with minimal effort:
- Stamping Kit: Invest in a nail art stamping kit, which typically includes stamping plates with various designs, a stamper, and a scraper.
- Select a Design: Choose a design from the stamping plate and apply a nail polish specifically formulated for stamping onto the chosen design.
- Scrape and Stamp: Quickly scrape off excess polish with the scraper, then press the stamper onto the design to pick up the pattern.
- Transfer to Nails: Carefully transfer the design from the stamper onto your nail with a gentle rolling motion.
- Clean Up: Use a small brush or cotton swab dipped in nail polish remover to clean up any excess design or smudges.
- Top Coat: Seal your stamped design with a clear top coat for added durability and shine.
Stamping allows for precise and intricate designs with minimal artistic skill required, making it an excellent choice for stunning nail art.
Conclusion
In summary, nail art is a versatile form of self-expression that empowers you to convey your individuality and creativity through your fingertips. By mastering essential tools, techniques, and nail care, you can turn your nails into striking canvases for personal expression. Whether you opt for subtle sophistication or bold, eye-catching designs, the world of nail art invites you to explore and experiment. So, embrace this artistic journey, and let your nails tell your unique story, one stunning manicure at a time.
Related Post
- Face Cleansers for Oily Skin
- Smooth and Silky Effortless Facial Hair Removal at Home
- Nail Art Tips and Tricks for Stunning Manicures
- Mastering the Art of Eye Makeup
FAQs
Nail art is the practice of decorating and enhancing nails with various techniques, colors, and designs, often using nail polish, nail extensions, or other creative materials.
No special skills are required to start nail art. Beginners can begin with simple designs and gradually build their skills with practice.